The video editor in Youtube Studio Desktop lets you trimp and cut the beginning, middle or end of your videos. You don’t have to reupload a video to trim it and the videos URL, view count and comments will stay same.
To use the video editor, go to Youtube Studio, then content. Choose the video you’d like to make changes to then go to editor. When you select “Trim & Cut,” a blue box will appear in the editor.
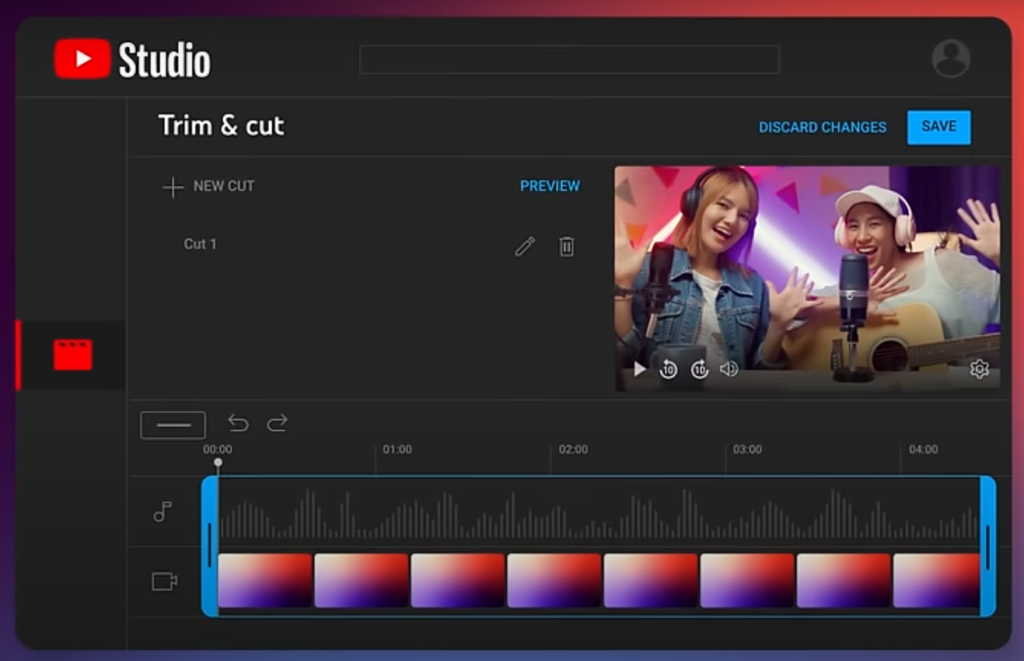
To trim your video you can drag and drop the end of the blue box to cut down the beginning or the end of your video. Anything not in the blue box will be removed from the video. You can use the video preview player to see what your cuts will look like.
If you want to make edits to the middle section of your video, select “new cut.” This will cause a red box to appear in the editor. Yo can drag and drop the sides until the red box is covering the part of the video you want to remove. Anything not in the red box will remain in the video.
If you want to trim or cut your video at a specific time you can enter the time into the box. Once you’re done you can confirm your cut by clicking the checkmark.
Note: you can have multiple cuts. Once you’ve saved your first cut you can drag the playhead to where you’d like to make another edit and select “new cut” again.
To review your edits, select “Preview” or use the play button in the preview player. If you change your mind about the edits you can use undo , redo or te pencil or trash icon to make edits or delete your cuts. You can click “Discard Changes” at any time to cancel your changes, Once you’re satisfied with your video edits, “click save.” If you ever change your mind about your edits even after they’re already pushed live you can always come back to the video editor, click the 3-dot menu and select the option to revert back to your original video.
For more information about Youtube, you can also check out our other articles.
Regards: All About Youtube